
**Lets Notify has 2 type of segments **
📊 Static vs Dynamic Segments in Lets Notify
✅ Tip: Use Static Segments for fixed campaigns, and Dynamic Segments (when available) for behavior-based, always-up-to-date targeting.
🧩 How to Create a Segment in Lets Notify
Segments let you group subscribers based on specific filters, so you can send targeted campaigns 🎯 instead of broadcasting to everyone.✨ Steps to Create a Segment
- Go to Segments 📂
- From the dashboard, open the Segments section.
- Click New Segment.
- Choose Segment Type ⚙️
- Select the type of segment you want to create.
- Click Next to continue.
- Name Your Segment 🏷️
- Enter a clear Segment Name (e.g., Mobile Users, Active Leads).
- Add Conditions 🔎
- Under Conditions, pick the filter type (e.g., Properties about someone).
- Choose a Field (e.g., Mobile).
- Set the Condition (e.g., Equal).
- Define the Value (e.g., True).
- Click ➕ Add Condition to add more filters.
- Apply Conditions ✅
- Click APPLY to check how many subscribers match your filters.
- You’ll see Total number of Subscribers displayed.
- Enable Segment Status 🔘
- Toggle the Status switch ON to activate the segment.
- Save Your Segment 💾
- Click Save to finalize.
- Your new segment is ready to use in campaigns 🎉.
Screenshot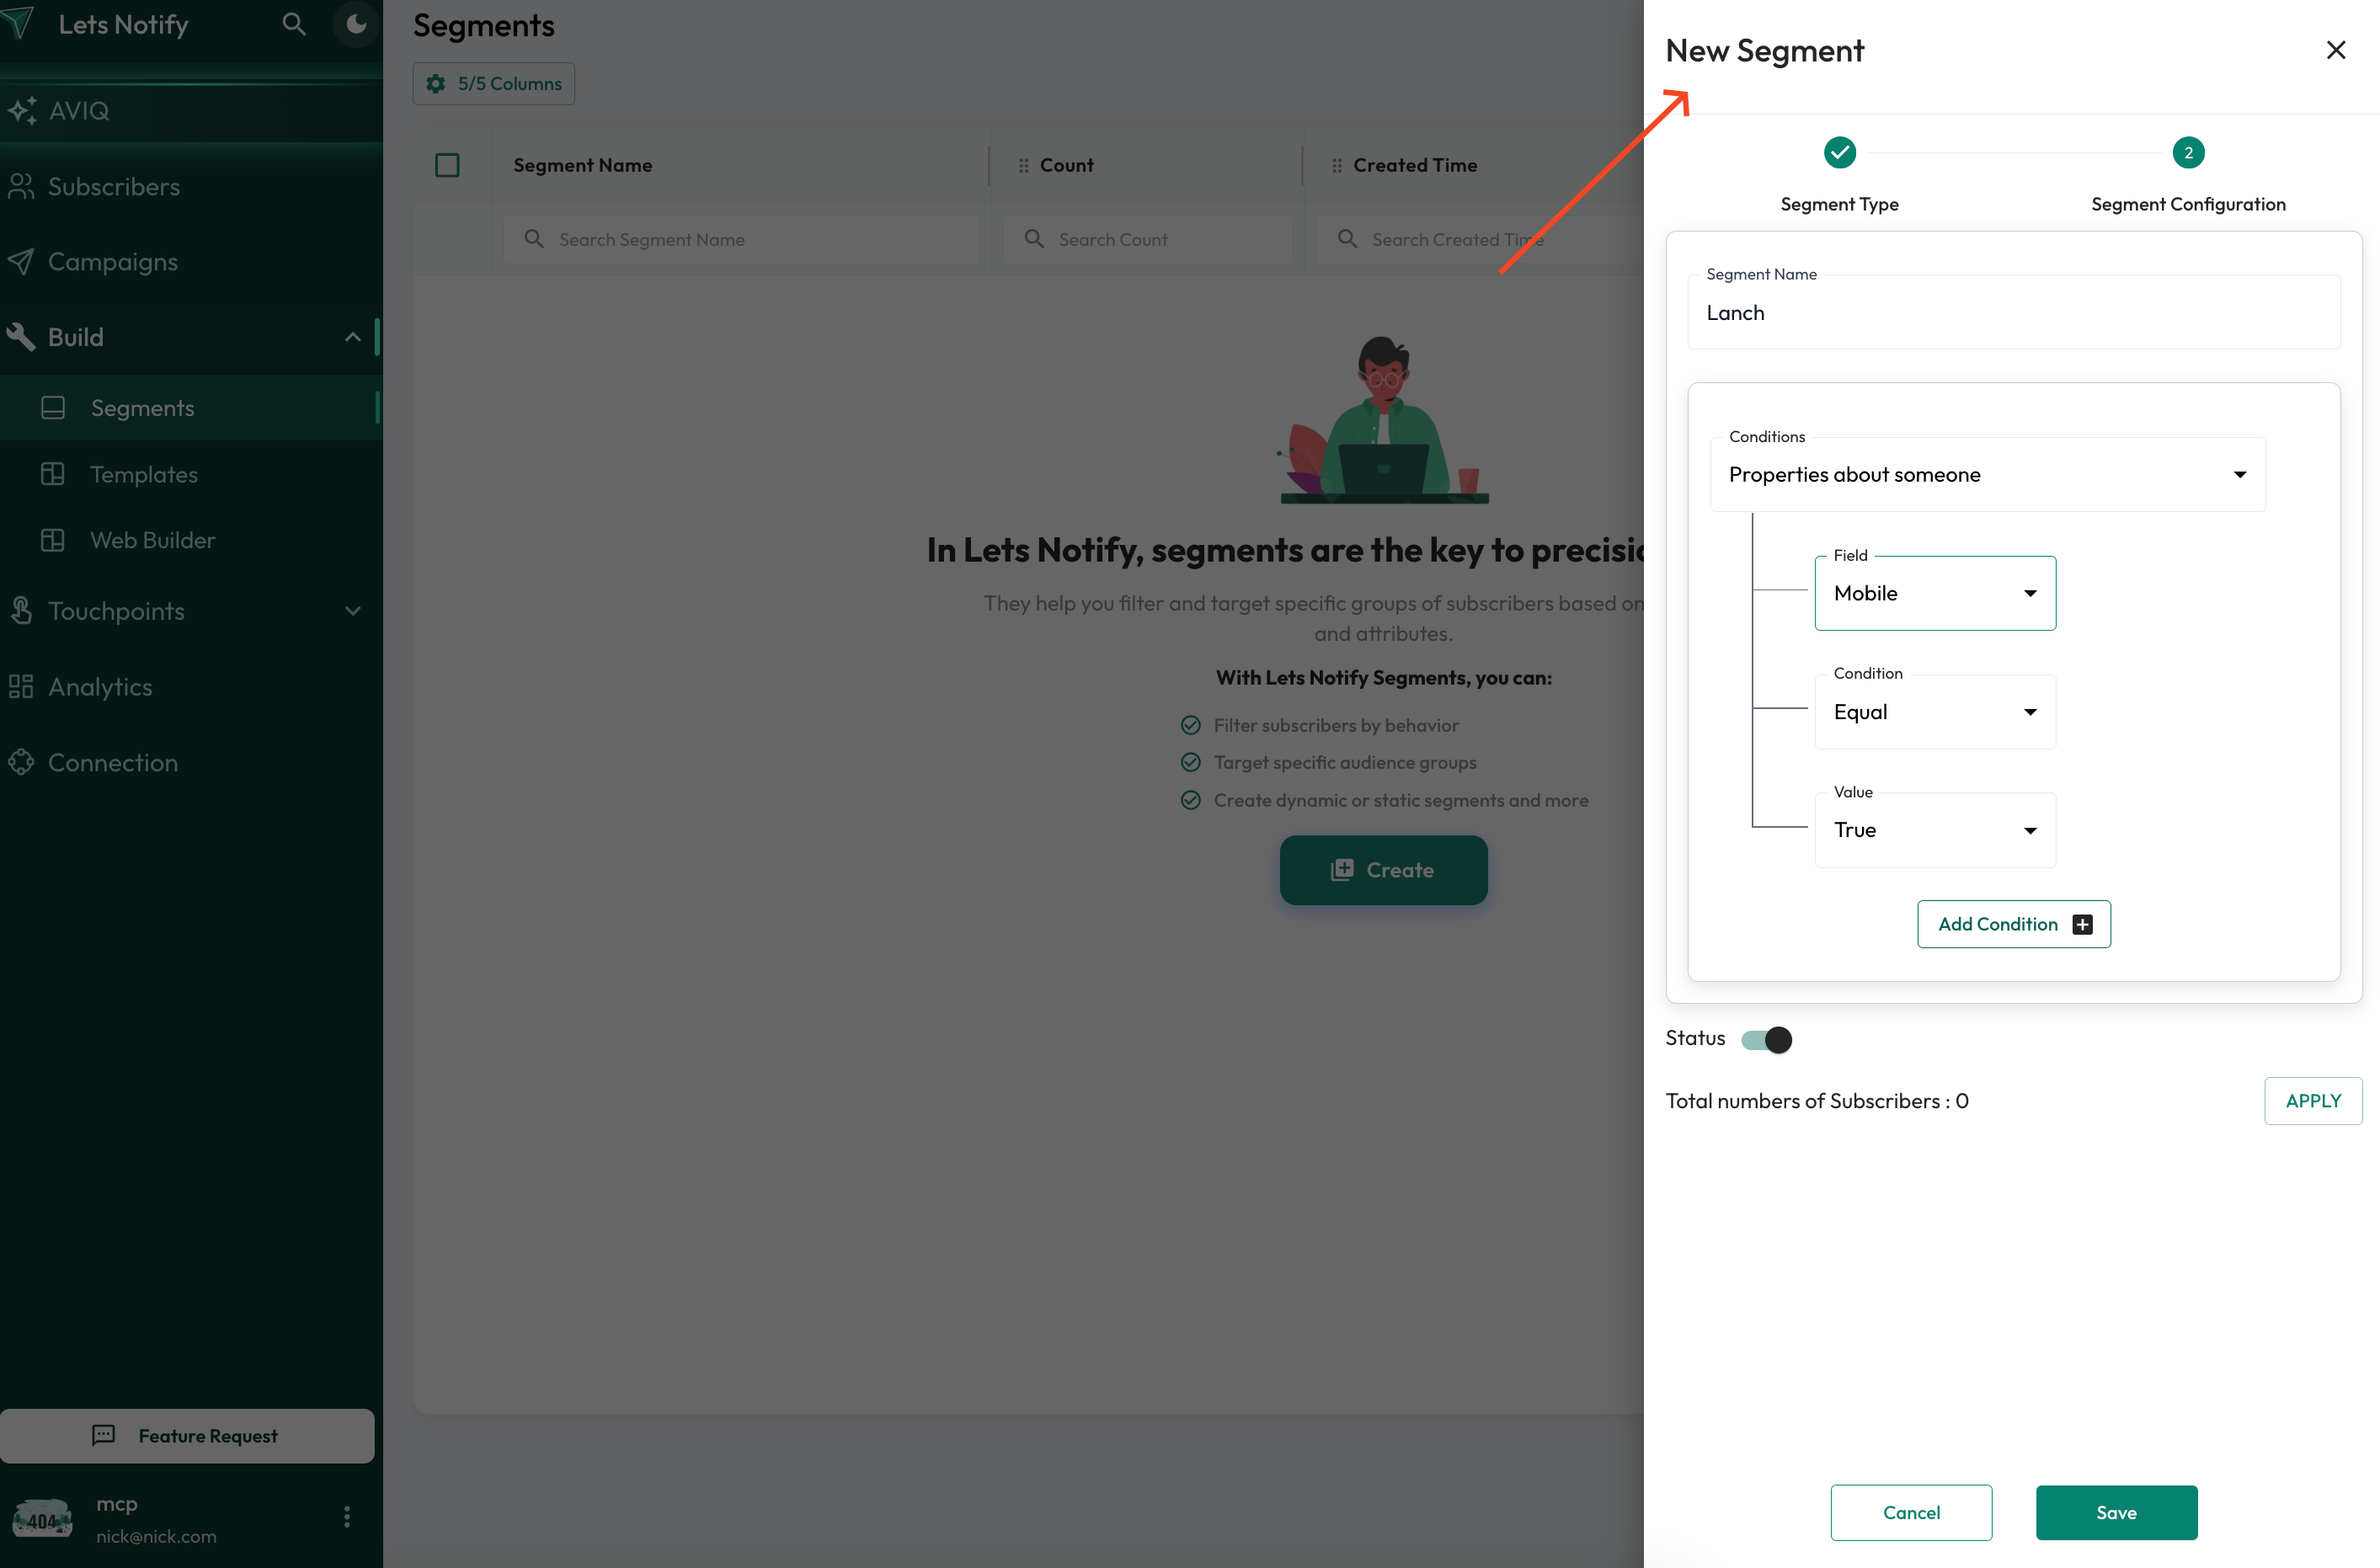
💡 Pro Tip: Combine multiple conditions to create precise audience groups.
Example:
Example:
- Mobile is True
- AND
- Subscribed Date within last 30 days