
Creating a Connection in Lets Notify
✨ What is a Connection?
A Connection lets you integrate Lets Notify with 3rd-party platforms like WordPress, Shopify, Custom React websites, and more 🚀. Let’s walk through how to connect Lets NotifyScreenshot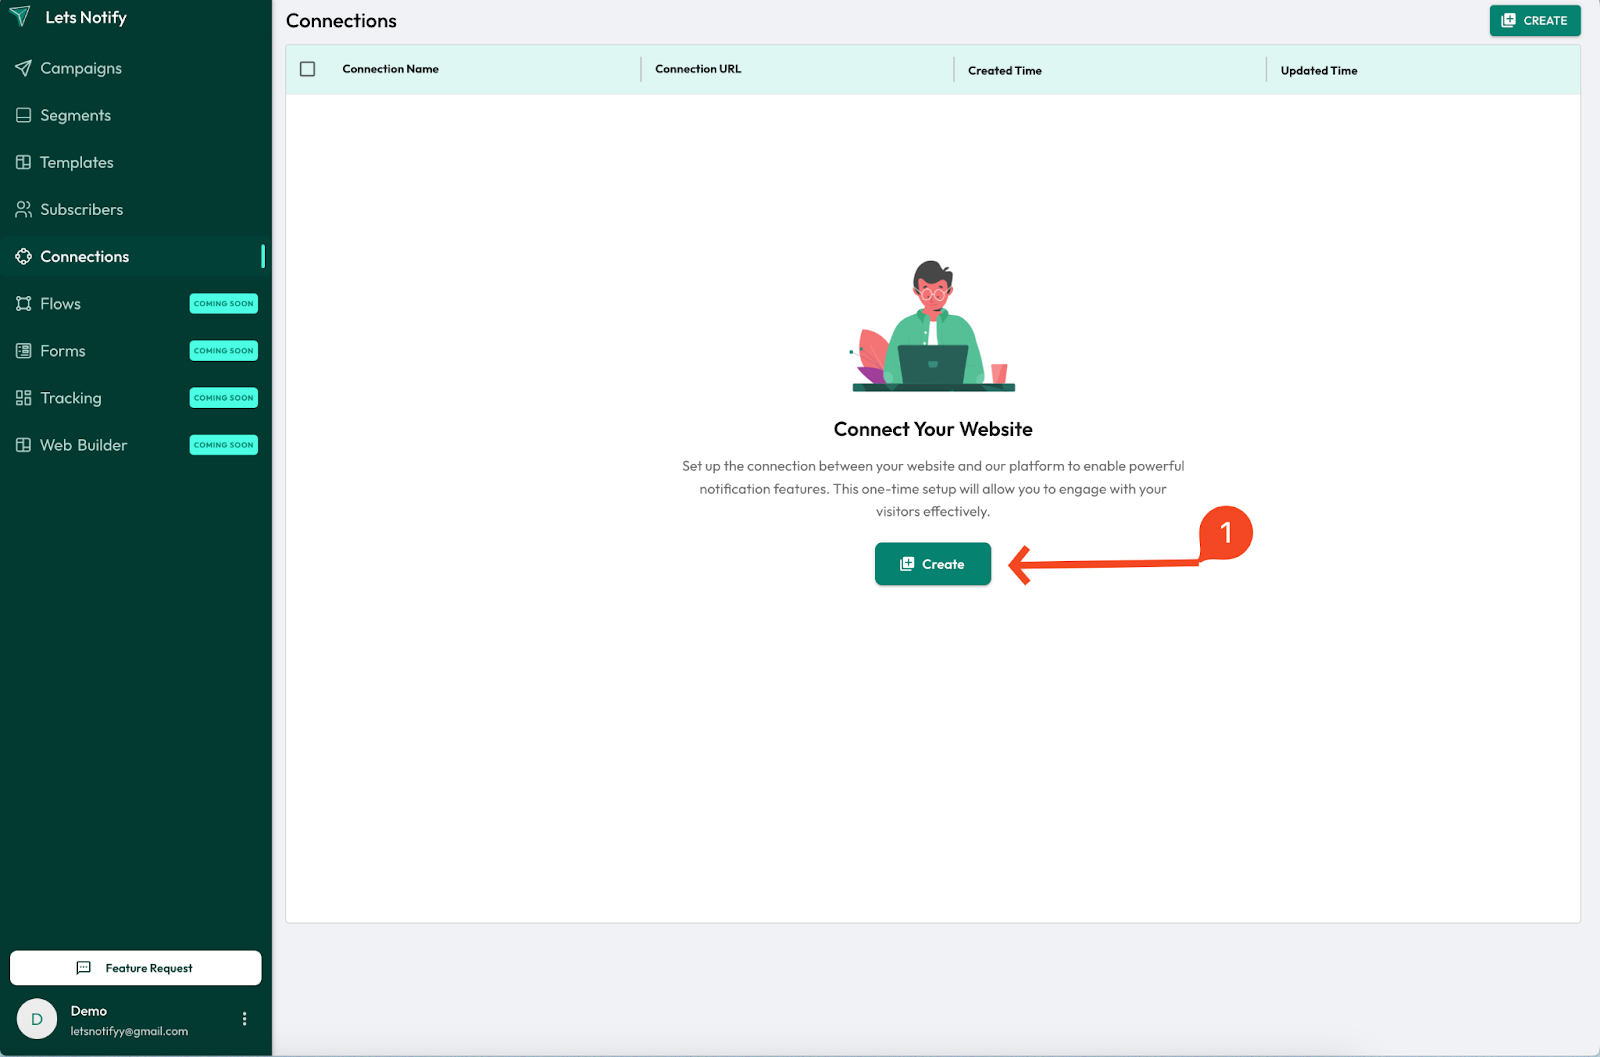
🛠 Step-by-Step Guide
🟢 Step 1 of 3 — Basic Details
📝 Enter your site’s details:- ✍️ Connection Name (e.g., My Blog)
- 🌐 URL (your website link)
- 🖼 Logo (upload your brand/site logo)
Screenshot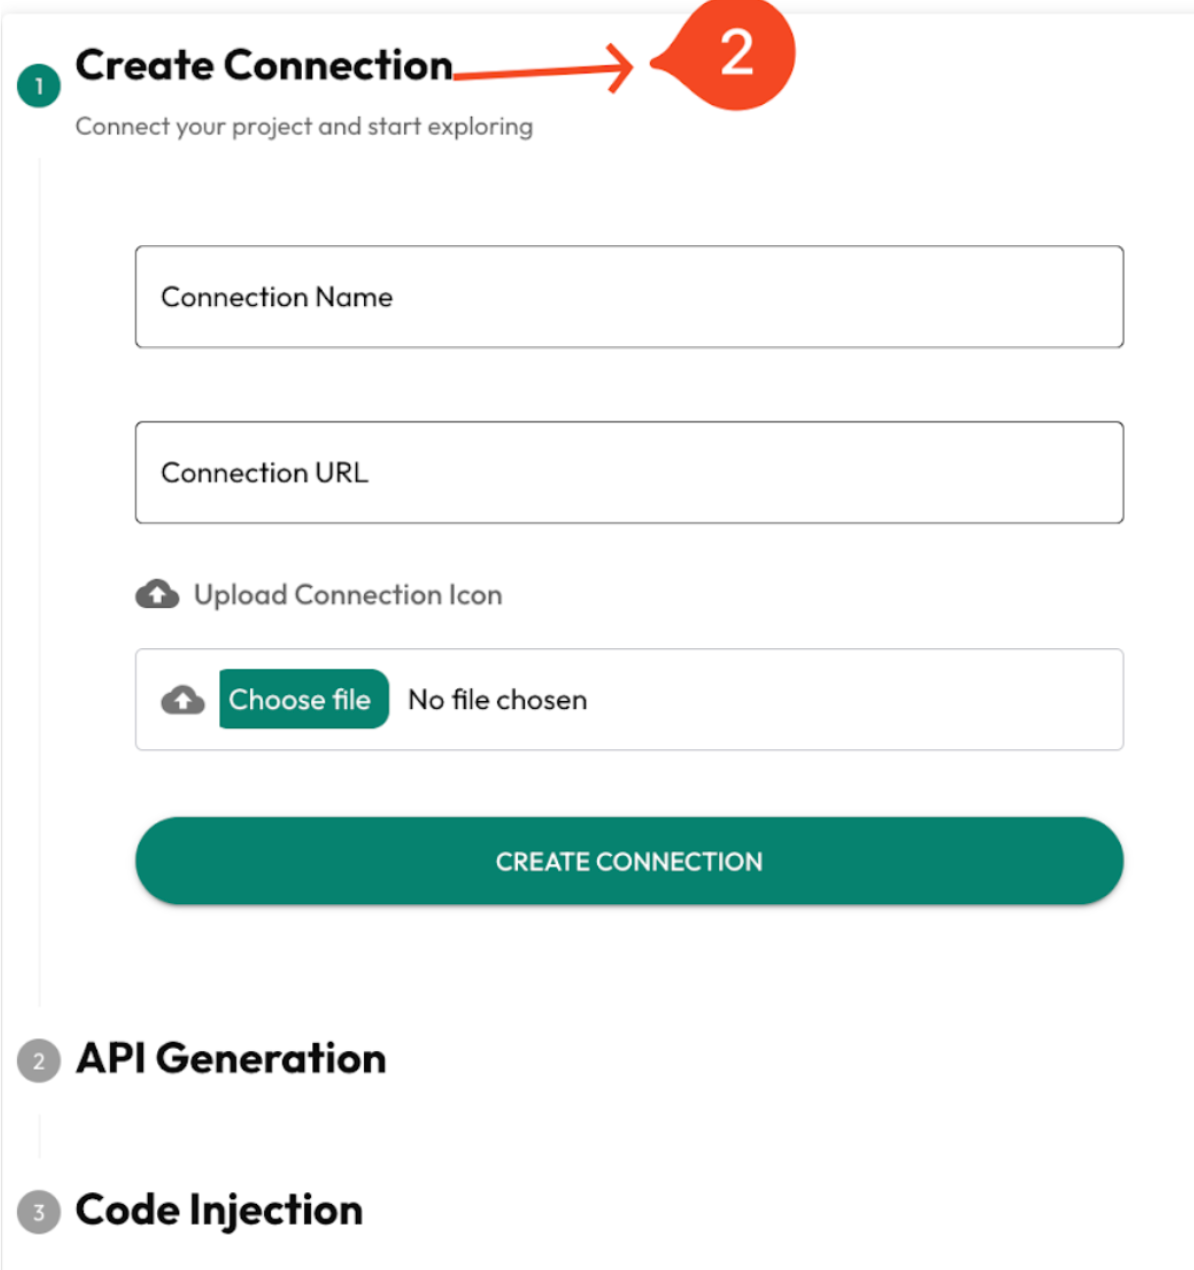
🟡 Step 2 of 3 — API Generation
- 🔑 Your API Key and Secret Key will be generated automatically.
⚠️ Important: - ⬇️ Download the API key file and save it securely.
- 🔒 Keys will not be regenerated later.
Screenshot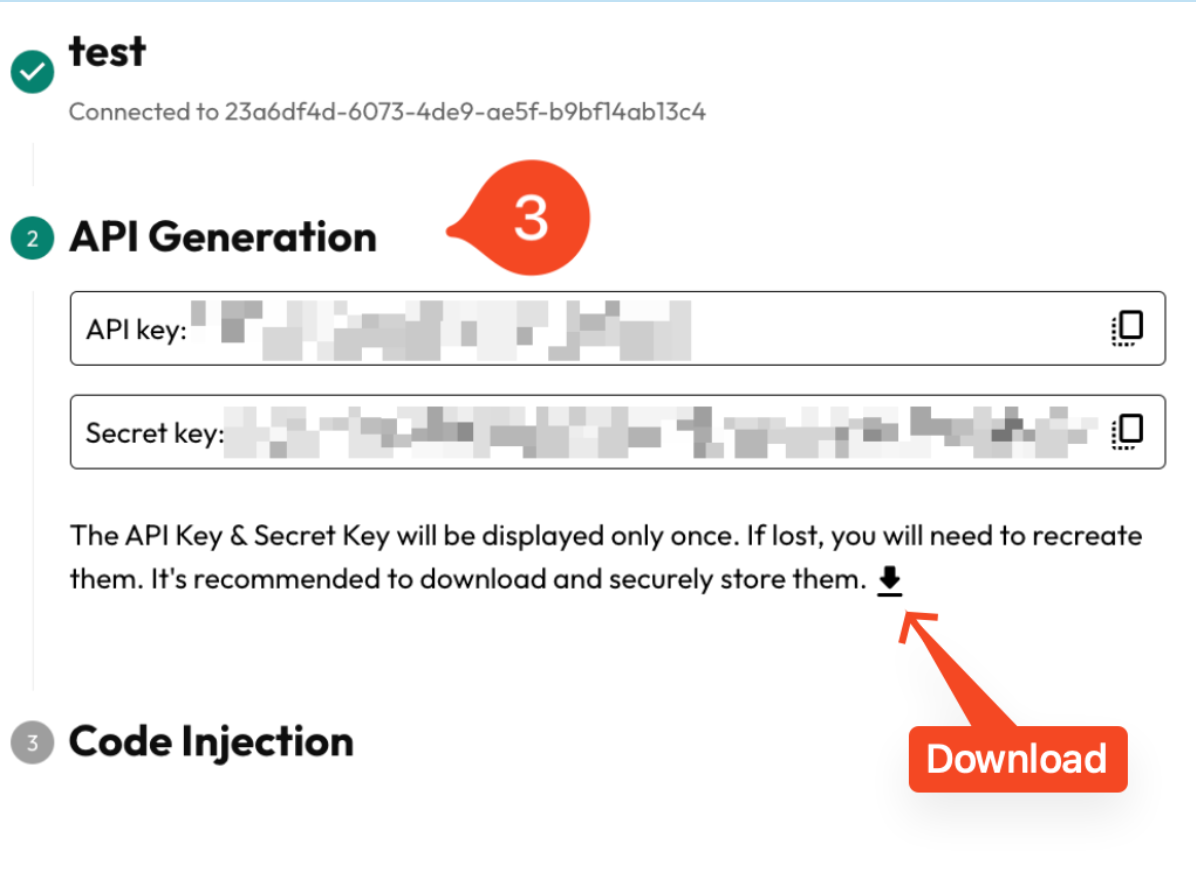
🔵 Step 3 of 3 — Code Injection (WordPress Setup)
- ⬇️ Download the provided ZIP file.
- ⚙️ In your WordPress Dashboard, go to:
👉 Plugins > Add New - 📤 Click Upload Plugin (at the top).
- 🗂 Select the downloaded ZIP file → click Install Now.
- 🚀 After installation, click Activate Plugin.
- Add the Connection ID, API, and Secret Key and hit save.
- ✅ Go back to Lets Notify and click the Complete button.
Screenshot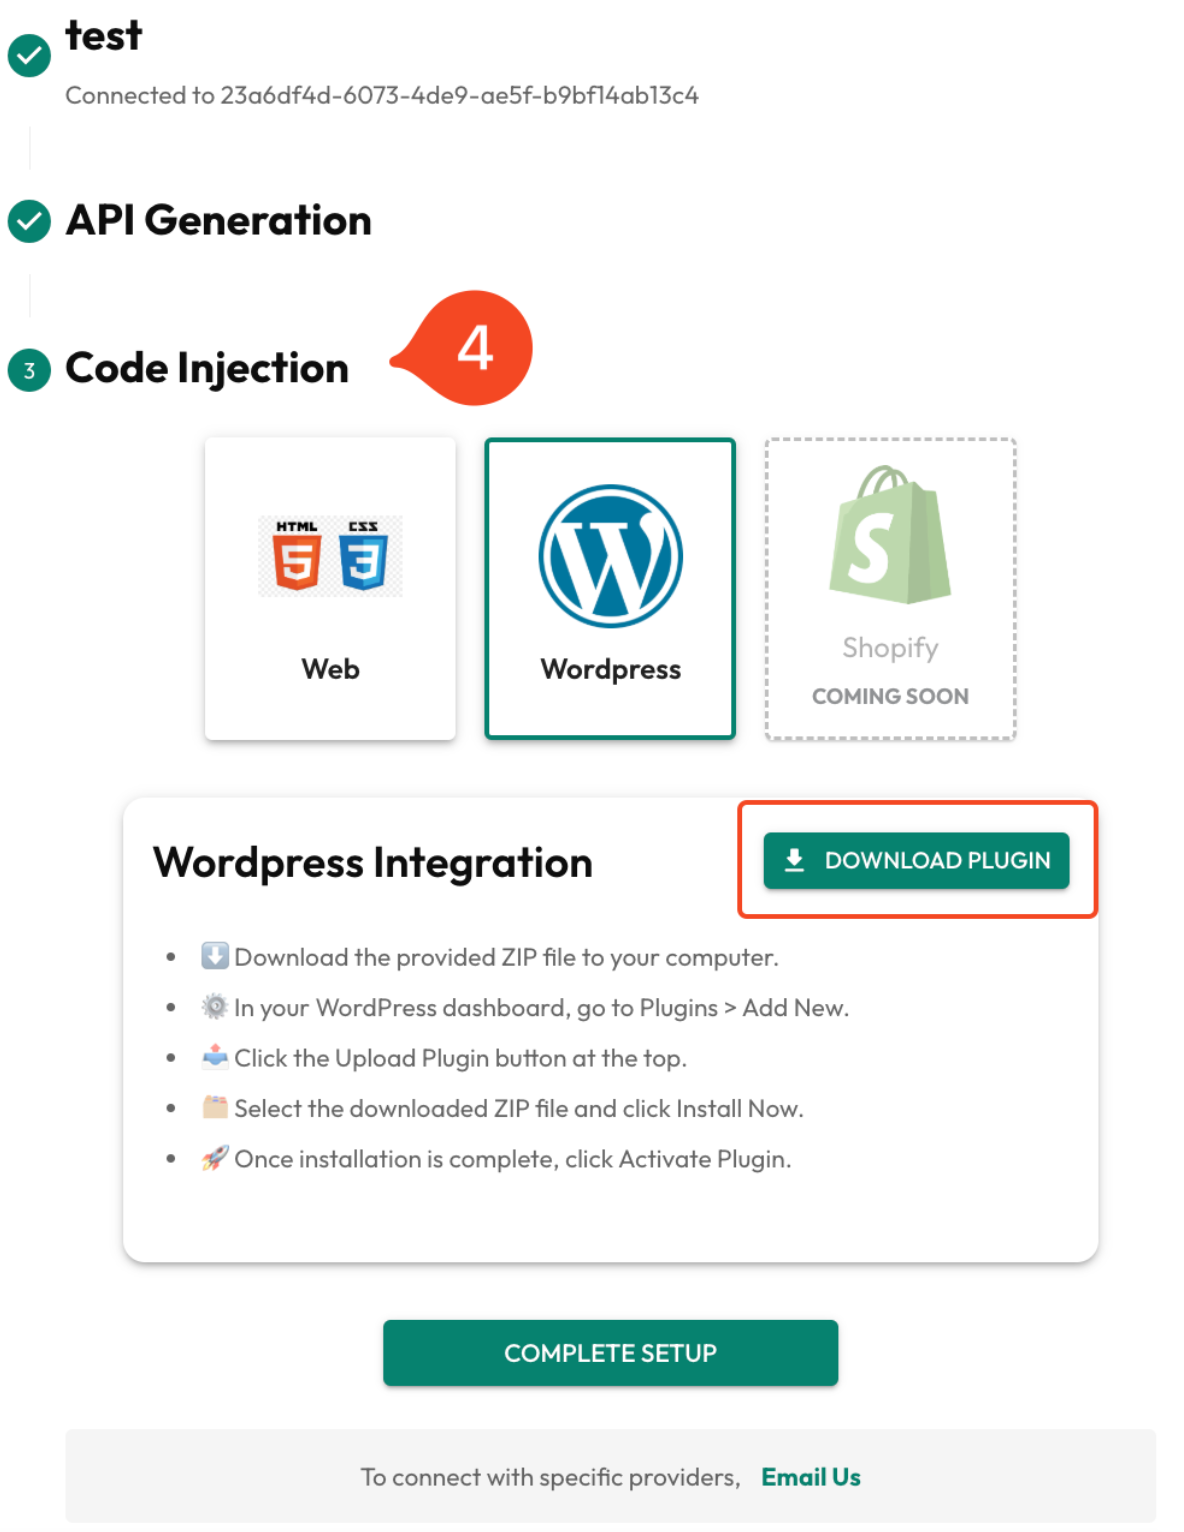
Wordpress (screenshot)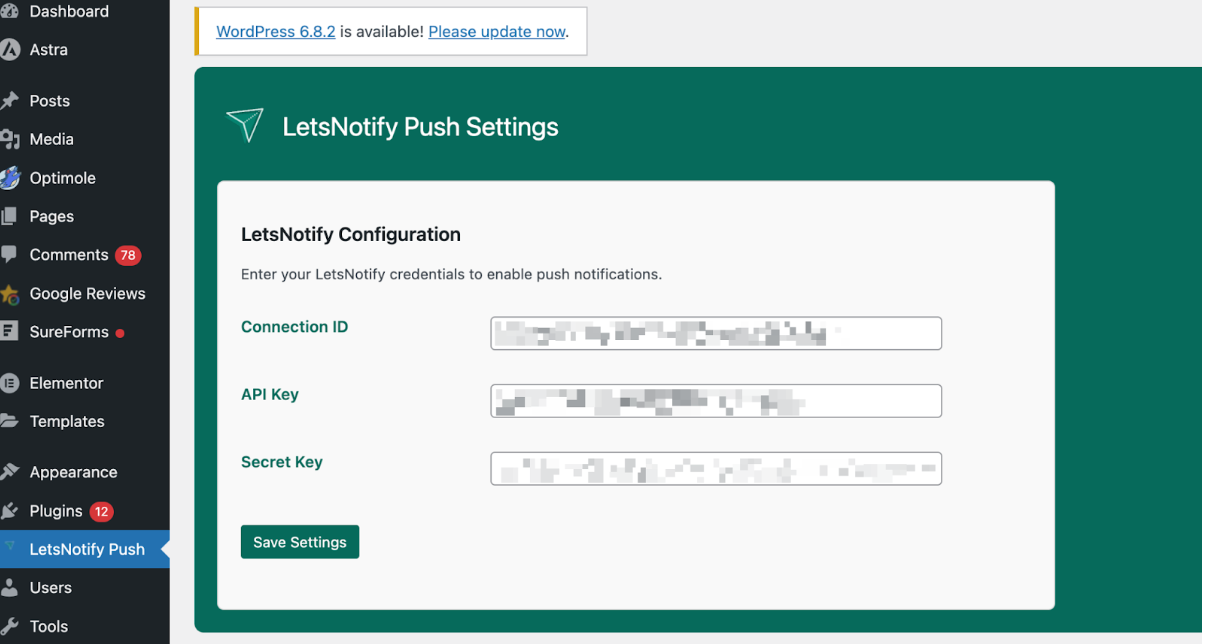
🎉 You’re All Set!
Your WordPress site is now successfully connected to Lets Notify.From here, you can start sending push notifications to your audience instantly 🔔✨.
Notes
- 📧 Email Confirmation – Once your connection is created, all details will be sent to your registered email
Screenshot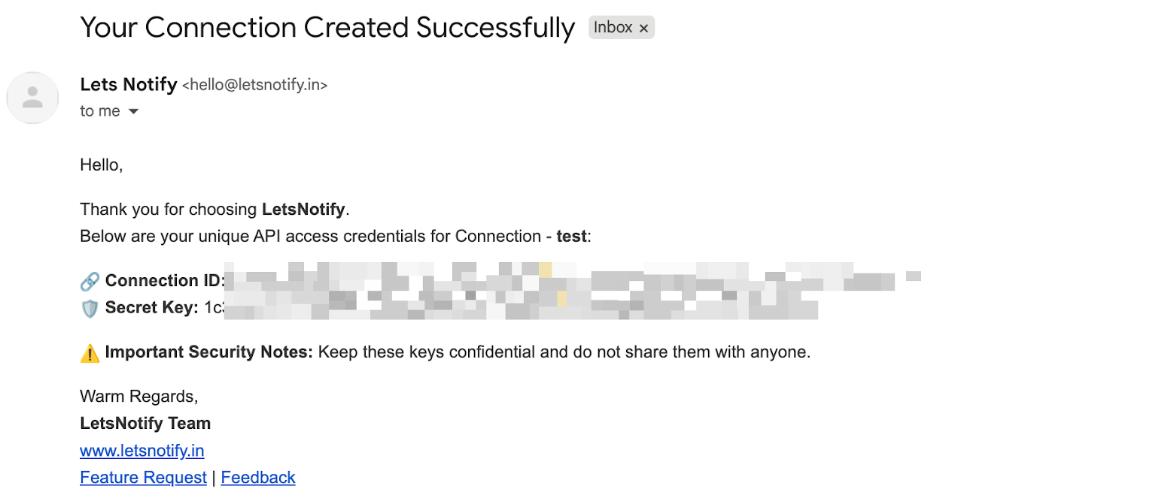
- ❌ Delete & Recreate – If you’d like to delete an existing connection and create a new one, just drop us an email at hello@letsnotify.
- 🌍 Other Integrations – Want to connect with other 3rd-party platforms (besides WordPress, Shopify, Custom React website.Send us an email at hello@letsnotify and we’ll help you set it up.
- 👉 Once the connection is created, ensure that both a custom prompt and a welcome template are set up.